I had to Frankenstein an old Word tutorial online on how to get the Text-to-Speech function on Word
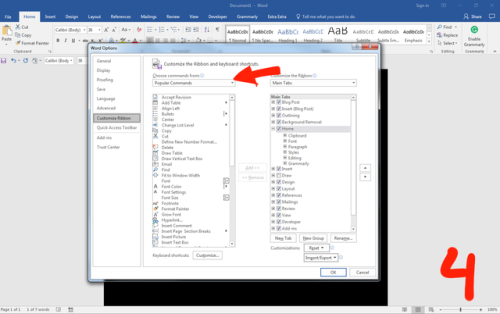
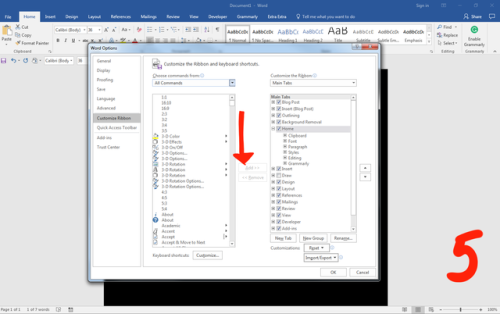
I had to Frankenstein an old Word tutorial online on how to get the Text-to-Speech function on Word 16 and since it’s free to folks with student emails from certain schools (YES If you have a student email, check and see if it’s free to you! I got free Kaspersky anti-virus software with my email too so check for your free shit!) I decided to make a quick tutorial for other folks. There is a text narrator function built into windows 7 but for some reason it doesn’t read on Word 16 without a fight. Why I use text-to-speech. Proof reading for one. Words like read and read (You know) only get read one way even with context but it’s easier to find missing articles and to help hear how the story flows. I also use it just to to hear if the story is even good. I think stuff I write is boring sometimes but that’s because It’s 1) not done and 2) I know what I want others to hear. It helps find the missing pieces of the story when you put yourself in the place of the reader. So tutorial. Long but that’s Word for you. 1. Click file. Sounds easy but like they moved so much stuff around you just gotta know how to crawl before you walk. 2. Click Options. 3. Now click Custom Ribbon. This will take you to the place options to change your tool bar. 4. Now it’ll default say “Popular Commands”, click this and go to All Commands. This has every command ever. 5. Scrooooll down until you find the one that says “Speak”. 6. There it is!7. This is the fun part. Let’s go. You have to add the “Speak” command to a group. And a group has to go in a tab. The tabs are the things that say “Home” “Insert” “Design” ect, the blue part up top. The group is each little sub subsection within that. Using my standard setup as an example, the groups are the things like the clipboard box that contains the paste, cut, copy, ect within the Home tab. I’d rather not fuck with the standard pieces because I don’t want to move stuff. So you can make your own custom tab to put new groups in.1. Click new tab. *I already have a tab with the speak command in it so I’m just making a new one for the tutorial. 2. You got a new tab! You can rename it if you want to something that means anything to you. 3. You can’t add the speak command to the “tab” so make sure to click group so it’s highlighted. 8. Now! Highlight “Speak” (Ignore the highlighted command, I clicked something after I made the screen cap) and click add. Now it’s in the group! You can dig through other commands (Go to Commands not in the Ribbon instead of all commands to see which one’s aren’t default put on there.) but you are done here. Close out and try it out. 9. Click on your new tab (This isn’t the new tab I just made but my own tab) and then highlight the words you want it to read. There will be a speak button within the group (Or the only button if you only put the one) and click it. There is a word limit on what it will read. I don’t know the exact number but it stops before it’s done if you highlighted it too long. -- source link
Tumblr Blog : 8-legs.tumblr.com
#word 16#microsoft word#tutorial#helping :d


