misguidedtangents: Misguided Tutorials : School Blazer : Doki Doki Literature ClubPart 1 / 2 /
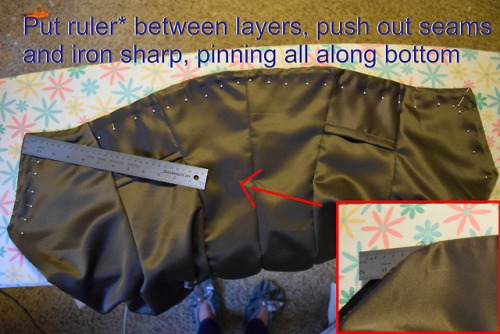
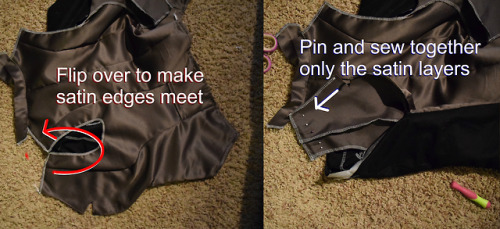
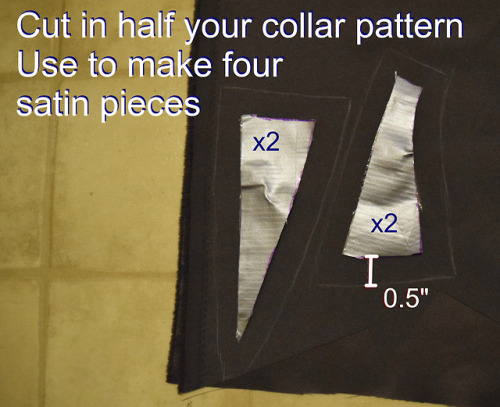
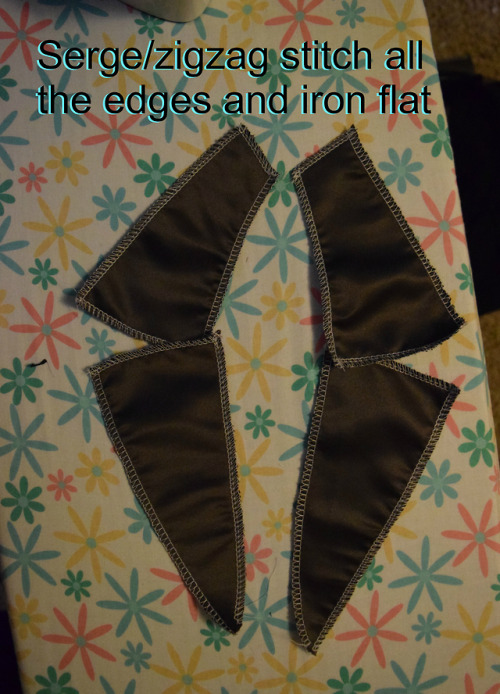
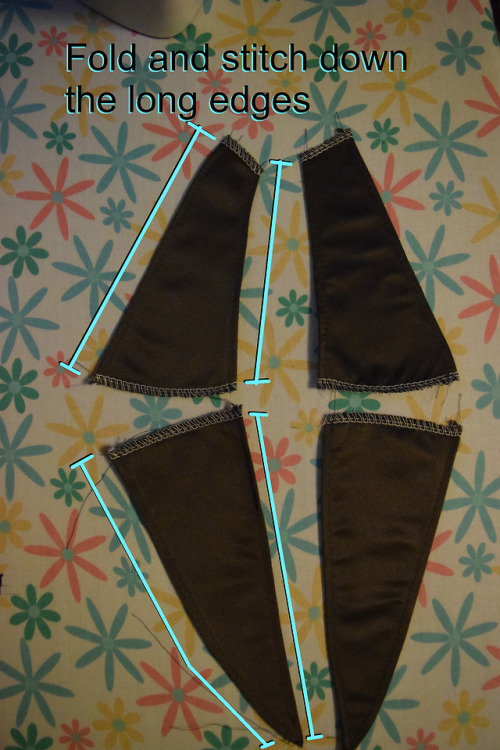
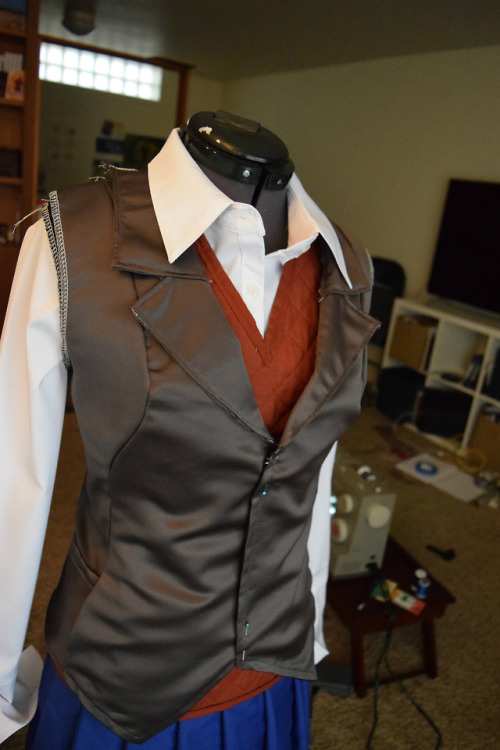
misguidedtangents: Misguided Tutorials : School Blazer : Doki Doki Literature ClubPart 1 / 2 / 3 / 4 / 5 / update coming 02-19Step 39: Turn your blazer “right side” out. Using a flat object that can handle heat (like a metal ruler) sneak it between your satin and liner layer. Push out all the seams and iron them to look sharp and crisp. Pin the layers together as you do, all along the bottom and button seams.Step 40: Using a needle that does NOT snag your fabric, sew a line along the bottom and button edges about an eighth of an inch away from the edge. Once you’ve done this you can remove the pins. This line will show, so take care to be straight and accurate with your line. Step 41: Laying your piece out, with the satin facing up, turn over your front half. Your goal is to have the shoulder edge of the back panel and front panel meet. Pin together only the satin fabric this way. The photos should help you visualize how to do this. Sew together the satin shoulder pieces. Step 42: Grab your collar duct tape pattern. Cut it in half near the “V” cut out. Use it to draft two copies of each piece. It should be a half an inch larger in every direction compared to the pattern piece. Step 43: Serge or zigzag stitch every edge of these collar pieces. Iron flat. Step 44: Fold over the long edges of your collar pieces, iron the crease if needed, and sew it down.Step 45: Pin your liner/interfacing layer to your bottom layer of satin on the collar. Make sure the ball side of your pin is hanging out over the edge of the fabric. You may only need a couple of pins, just enough so the liner won’t move on you. Step 46: On top of this liner layer, start pinning down your four satin collar pieces you just made. Start with the bottom pieces. You will need to fold the short edge to match the angle of the “V” your bottom layer has. Use LOTS of pins for this, take your time lining everything up. (The balls of your pins can face towards the fabric.) Step 47: Sew along every edge of the triangle collar pieces. Once every edge is down, you can start removing the pins, including those liner layer pins. Step 48: Try on the piece and make certain everything is sitting and looking how you expect, especially around the collar. Make your adjustments now. Notes: You may notice a back collar piece in some of the photos. Don’t worry, that will be covered next part. You didn’t miss anything. I accidentally attached mine too early and it just got in the way. -- source link
Tumblr Blog : misguidedtangents-blog.tumblr.com
#school blazer#cosplay tutorial
