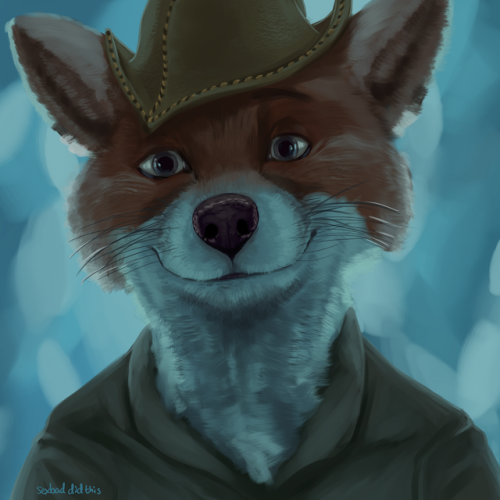
sexbadsfw: Love I decided to push myself and try a couple new things, and I am so proud of the resul
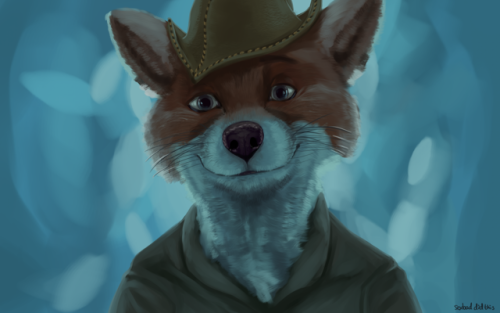
sexbadsfw: Love I decided to push myself and try a couple new things, and I am so proud of the result. Here are some 16:10 desktop versions of this: HD | 4KAnd a long winded tutorial sort of thing!I saved sort of intermittent previews of this, though they’re not exhaustive, so I figured I may as well share them. There’s a bit more that happened between the sketch and the image after it, but it’s nothing too important I guess.I’m still very much an amateur, because I’ve only got a little over one year of experience in drawing anything. People tend to be surprised when they hear this, even when they’re not seeing whatever I consider my best work at the time. Despite how uncertain I can be about my ability, I no longer doubt that I’ve been progressing fast, and it feels good.So I feel like I’ve picked up a few tricks that I think are worth sharing, because like I said, I’m genuinely proud of this picture. Maybe you’ll find some new tricks in this sort-of tutorial. If there’s anything you’re curious about, just send me an ask. Also feel free to provide criticism or give me hints. I want that too.I did everything (after the sketch) except the whiskers on one layer in ClipStudio Paint. The whiskers are of course very fine lines, and I just didn’t feel like painting around them if I needed to edit something. This may not sound like a good idea, and it probably isn’t. I don’t use a single layer for all my pictures, but I tend to use few for much of what’s in them. This would change if I was doing some sort of complex background, or multiple versions, or whatever. For a lot of stuff, though, I do prefer just to use one layer once I know what I’m doing, because then it’s just me and the colors, and little else to worry about.I basically used three brushes, all free from somewhere in the ClipStudio asset browser thing. The first two were oil paint brushes, which in this program meant that they sorta pick up the color they’re painted on top of and mix it in a bit with whatever color I’ve selected. One of these was the flat wet brush in the kidkyan oil brushes set. You can see its oblong shape in some of the highlights in the background, but I used it all over the place at various sizes. It’s in the whiskers, some of the fur detail, the clothing, the eyes, the gleam in the eyes, etc. I think I changed this from the default so that the brush changed direction dependent on the direction of my pen.For the second brush, I cloned the first one but made my own brush material that showed the individual bristles, so to speak. I used it for some of the fur, and you can basically see it in action where there’s any highlighting.The third brush was something new for me, listed in ClipStudio as 木目ブラシ, which means it’s designed for some sort of wood texturing. What attracted me to it was that it gave this sort of wiry pattern that used both the foreground and background colors. This seemed like a cool way to detail fur with both little shadows and highlights at the same time. I modified it a little bit so that it fades in and out, rather than starting and ending abruptly. I don’t think it’s as obvious as the other two brushes, but it did still help with stuff.To start with, I mainly blocked things out by taking colors right out of this original shot from the movie. The clothing didn’t matter much to me by this point, so I left it blocky and tried to provide basic shading for Robin’s head. For highlights, I took the lighter shade from the background and mixed it lightly on Robin’s fur with my oil paint brush. Then I sampled the resulting color and painted that on more thoroughly. For shadows I went kind of in the opposite direction on the color picker–warmer, but even less saturated. I think it worked out pretty well. You can also see bits above where I tested out that wood texture brush, mainly on his neck. They didn’t really survive into the final thing.What follows isn’t really a purposeful step-by-step series of WIPs or anything, but it may be satisfying to see the picture come together.Around here is where I got serious about making him fluffy, as you can see in his neck below. I made a couple changes in the final version that I think make it look less rugged.I did an image search for foxes, by the way. This let me reference what the real ones look like even though realism wasn’t quite my goal. Real foxes, after all, are much more uniformly puffy, while Robin Hood’s head has a distinct shape that sits atop a thinner neck. I used the various pictures of foxes that I found to determine smaller details, like the shape of the nose, the relative darkness around the eyes, the little black patches on the muzzle, the shape of the mouth, and where the whiskers are placed.I think I managed to maintain some realism while remaining true to Robin’s original shape and dreamy expression. I’m satisfied with the mouth in particular, because it’s a very different shape, but it still came out looking peaceful and bright.The eyes were one of the first things I worked on most of the way, because I’ve become kind of crotchety about avoiding the uncanny valley with them. They stayed mostly the same until near the end, when I added a couple reflective details in them. I think taking care of eyes first is great, especially if you’re going to stare at them for the next couple of hours. Vacant or unfocused eyes, just by a little bit, can ruin a picture’s mood for me.Detailing the fur was kind of an issue. I think I was only comfortable with the fur on his neck in the very final result, up top. I did a lot of small iterations on it. My method that eventually worked was alternating patches of shadow and highlight, toward the center with my bristly oil paint brush.Robin’s outfit was almost entirely made with the first oil paint brush I mentioned. I added the golden/black threading after seeing something similar in an image search for Robin Hood hats. I also fussed around with some pastel brush (I think) to try to give the hat a suede-like texture that ended up kind of working.I sharpened the final result up above, which I think makes the lighting stand out more. That’s about everything. I hope this was an interesting and informative read. -- source link
Tumblr Blog : sexbad.tumblr.com
#sexbad#tutorial#disney#robin hood#cartoon#digital painting#my art#desktop wallpaper#animation#fan art#wallpaper

